Getting started with Arduino programming just got easier with the Arduino IDE 2.3.6 and Setup process. This complete installation guide walks you through everything you need to know to get your development environment running smoothly in 2026.
This guide is suitable for beginners, makers, and developers upgrading to the latest IDE. Follow explicit instructions, whether you are new to the setup or updating it.
First, check your system requirements and the pre-installation checklist. Next, download Arduino IDE 2.3.6 from official sources. Then, follow the step-by-stepinstallation process for Windows, Mac, or Linux and get started quickly, no matter your computer.
By the end, you will have Arduino IDE ready for your project, with sample code to confirm it’s working.
System Requirements and Pre-Installation Checklist
Operating System Compatibility for Windows, Mac, and Linux
Arduino IDE 2.3.6 supports all major desktop operating systems. Windows users require 64-bit Windows 10 or later; Windows 7 and 8.1 are deprecated. Mac installations require macOS 10.15 Catalina or newer, supporting both Intel x86-64 and Apple Silicon (ARM64) architectures. Supported Linux distributions include Ubuntu 18.04 LTS, Debian 10, Fedora 32, or newer equivalents.
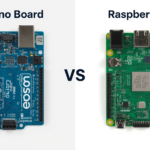
The IDE works best on 64-bit architectures across all platforms. ARM-based systems, including the Raspberry Pi 4 running Ubuntu, can run the Arduino IDE 2.3.6 via the Linux ARM64 package. Chromebook users can install the IDE using a Linux development environment if their device supports it.
Hardware Requirements and Storage Space Allocation
Your computer requires at least 4GB of DDR4 RAM for stable performance. For handling large circuit designs or multiple projects simultaneously, 8GB or more of memory is recommended. The CPU should be a dual-core processor with a minimum clock speed of 1.8 GHz. Quad-core CPUs offer significantly shorter code compilation times.
Storage requirements vary by installation type:
| Basic Installation | 500MB | 200MB for libraries |
| Full Installation with Examples | 1.2GB | 500MB for additional boards |
| Development Setup | 2GB | 1GB for project files |
The IDE generates cache files and stores hardware board definition files, which can accumulate over time. Reserve extra disk space for downloaded code libraries, board support packages, and user project files. Solid-state drives (SSDs) greatly improve IDE launch times and code compilation speed compared to hard disk drives (HDDs).
Java Installation Prerequisites and Version Verification
Arduino IDE 2.3.6 bundles its own Java runtime, eliminating the need for a separate Java installation on most systems. The bundled runtime includes Java 17 LTS, optimized for Arduino development workflows. However, some board packages or advanced tools might require a system-wide Java installation.
Check your Java version: open a terminal or command prompt and type java -version. If you see Java 11 or later, all requirements are met. On Windows, multiple Java versions can cause path issues. The Arduino IDE uses its bundled Java version automatically.
Users developing custom Arduino libraries or advanced projects should ensure that their JAVA_HOME environment variable references a supported Java Runtime Environment (JRE). This mitigates compatibility issues when integrating with third-party build systems or integrated development environments (IDEs) used alongside the Arduino IDE.
Network Connection Requirements for Download and Updates
A stable internet connection is required for installation and initial setup. The Arduino IDE retrieves microcontroller board packages, dependent libraries, and core firmware files directly from Arduino servers. Be prepared to download 200-500MB of data, based on your selected board architectures.
Corporate networks with strict firewall policies may block certain downloads. The IDE needs access to:
- downloads.arduino.cc (board packages)
- github.com (library repositories)
- registry.npmjs.org (web editor components)
- api.arduino.cc (authentication services)
Set proxy server configurations in IDE preferences. If you are behind a corporate firewall, whitelist these domains or set up proxy settings before installing. The IDE automatically checks for updates and requires periodic internet access to download new versions and security patches.
Offline installation packages are available for air-gapped environments, though some features, such as the library manager and board manager, won’t function without internet connectivity.
Downloading Arduino IDE 2.3.6 from Official Sources
Accessing the Official Arduino Website Safely
Getting Arduino IDE from the right source protects your computer and guarantees you’re installing legitimate software. Go directly to arduino.cc, which is Arduino’s official website. You will notice the clean, professional design and the prominently displayed Arduino logo.
Bookmark this URL to avoid accidentally visiting copycat sites that might host modified or malicious versions. Some fake sites use similar domain names, such as “arduino.com” or “arduinoide.net,” to trick users. The official site uses HTTPS encryption, shown by the lock icon in your browser’s address bar.
Look for the “Software” tab in the main navigation menu, then click on “Downloads.” This takes you to the dedicated download page where all official Arduino IDE releases are hosted. The page prominently displays the latest version, along with older releases for users who need specific versions.
Selecting the Correct Version for Your Operating System
The Arduino IDE 2.3.6 is available in different packages for various operating systems. The download page automatically detects your system and highlights the recommended version. Double-check this to ensure accuracy.
| Windows 10/11 | .exe or .zip | 64-bit architecture |
| macOS | .dmg | macOS 10.14 or later |
| Linux | .zip or AppImage | Most modern distributions |
Windows users have two options: the installer (.exe) or portable (.zip) version. The installer handles everything automatically and adds Arduino IDE to your Start menu. The portable version runs without installation. This option is perfect for users with limited system access or those who prefer keeping software contained.
Mac users get a standard .dmg file. It mounts as a disk image. Simply drag the Arduino IDE application to your Applications folder after mounting.
Linux users can choose between a compressed archive or AppImage format. AppImage files run without installation. The archive requires manual extraction and setup.
Verifying Download File Integrity and Authenticity
Download verification stops corrupted files and confirms authenticity. Arduino provides checksums for each download. These unique fingerprints change if the file is modified or corrupted during download.
After downloading, find the checksum file on the Arduino download page. This is usually a small text file called “arduino-ide_2.3.6_checksums.txt.” It contains hash values for each installer.
On Windows, open Command Prompt and use:
certutil -hashfile arduino-ide_2.3.6_Windows_64bit.exe SHA256
Mac users can open Terminal and run:
shasum -a 256 arduino-ide_2.3.6_macOS_64bit.dmg
Linux users type:
sha256sum arduino-ide_2.3.6_Linux_64bit.zip
Compare the computed output hash with the official checksum. The hash values must match exactly; a single mismatch indicates data corruption. If hash values do not match, delete the file and re-download it.
Some browsers show download progress and may automatically scan files with your antivirus software. This basic protection helps, but manual verification adds extra security assurance. This is especially important for development tools that access your computer’s hardware and network.
Step-by-Step Installation Process for Different Operating Systems
Windows Installation Procedure and Administrator Privileges
Download the Arduino IDE 2.3.6 installer for Windows from the official Arduino website. The installer is an MSI package, making the installation process straightforward.
Right-click on the downloaded installer file and select “Run as administrator.” This step is crucial because the Arduino IDE requires elevated privileges to install drivers and properly configure USB ports. If you skip this step, you might face driver installation issues later.
Follow the installation wizard that appears on your screen. The installer will detect your system architecture (32-bit or 64-bit) and configure the appropriate components. Accept the license agreement and choose your installation directory. The default path works for most users, but you can customize it if needed.
During installation, Windows might display security warnings about unsigned drivers. Click “Install” when prompted to install the Arduino USB drivers. These drivers are essential for communicating with Arduino boards via USB.
The installation typically takes 3-5 minutes, depending on your system speed. Once complete, you’ll see a desktop shortcut for Arduino IDE 2.3.6. The installer also adds the program to your Start menu for easy access.
macOS Installation with Security Permission Settings
Download the Arduino IDE 2.3.6 DMG file for macOS from the official Arduino website. Make sure to download the version compatible with your macOS version, either Intel or Apple Silicon.
Double-click the downloaded DMG file to open it. A new window will appear showing the Arduino IDE application icon and an Applications folder shortcut. Drag the Arduino IDE icon into the Applications folder to install it.
The first time you run Arduino IDE 2.3.6, macOS will likely block it because it’s from an “unidentified developer.” This is normal security behavior. Go to System Preferences, then Security & Privacy, and open the General tab. You’ll see a message about Arduino IDE being blocked, with an “Open Anyway” button next to it.
Click “Open Anyway” and confirm your choice when prompted. You might need to enter your administrator password. This action adds the Arduino IDE to your system’s trusted applications list. macOS also requires the Arduino IDE to have permission to access USB devices.vices. When you first connect an Arduino board, the system will ask for permission to access USB accessories. Grant this permission to enable proper communication with your Arduino hardware.
For newer macOS versions, you might also need to grant permission for the IDE to access files in certain directories. These permission requests will appear automatically when needed.
Linux Installation Commands and Package Management
Linux installation varies depending on your distribution. For Ubuntu- and Debian-based systems, download the 64-bit Linux version from the Arduino website. The file is a compressed archive (.tar.xz).
Open your terminal and navigate to the Downloads directory:
cd ~/Downloads
Extract the downloaded archive:
tar -xf arduino-ide_2.3.6_Linux_64bit.tar.xz
Move the extracted folder to /opt for system-wide installation:
sudo mv arduino-ide_2.3.6_Linux_64bit /opt/arduino-ide
Create a symbolic link to make the Arduino IDE accessible from anywhere:
sudo ln -s /opt/arduino-ide/arduino-ide /usr/local/bin/arduino-ide
Add your user to the dialout group to access serial ports without root privileges:
sudo usermod -a -G dialout $USER
Log out and log back in for the group changes to take effect. You can also install Arduino IDE through the Snap package manager on supported distributions:
sudo snap install arduino-ide
For Arch Linux users, install from AUR:
yay -S arduino-ide
Create a desktop entry by copying the provided .desktop file:
sudo cp /opt/arduino-ide/resources/app/resources/icons/512x512.png /usr/share/pixmaps/arduino-ide.png
Troubleshooting Common Installation Errors
Windows Driver Issues: If your Arduino board isn’t recognized, manually install drivers through Device Manager. Right-click on the unknown device, select “Update driver,” and browse to the Arduino IDE installation directory’s drivers folder.
Permission Denied on Linux: This usually means you’re not in the dialout group. Run the usermod command mentioned above and restart your session. You can verify group membership with: groups $USER.
macOS Gatekeeper Blocking: If you can’t find the “Open Anyway” button in Security preferences, try holding the Control key while clicking the Arduino IDE icon, then select “Open” from the context menu.
Antivirus False Positives: Some antivirus software flags Arduino IDE as suspicious. Add the installation directory to your antivirus whitelist or temporarily disable real-time protection during installation.
Corrupted Downloads: If installation fails, verify the integrity of your download. Re-download the installer from the official Arduino website using a stable internet connection.
USB Communication Problems: On Windows, try different USB ports or cables. On Linux, check if ModemManager is interfering by running: sudo systemctl stop ModemManager. Library Installation Failures: Clear the Arduino IDE cache by deleting the .arduino15 folder in your user directory, then restarting the IDE to rebuild it.
Initial Arduino IDE 2.3.6 Configuration and Setup
First Launch Configuration and User Interface Overview
When you first open Arduino IDE 2.3.6, the interface welcomes you with a clean, modern design that’s quite different from earlier versions. The main window displays a tabbed editor where you’ll write your sketches, and the left sidebar shows your sketch files and project structure. The bottom panel houses the serial monitor and output console, making debugging much more straightforward.
The preferences menu is your first stop for customization. Navigate to File > Preferences to access key settings. Set your sketchbook location – this is where all your projects will be saved. Most users create a dedicated “Arduino Projects” folder in their Documents directory. You’ll also want to enable verbose output during compilation and upload, which helps when troubleshooting connection issues.
The auto-completion feature in 2.3.6 is significantly improved. As you type function names or variable names, the IDE suggests completions, speeding up your coding. Syntax highlighting automatically colors different elements of your code, making it easier to spot errors.
Dark mode enthusiasts will appreciate the built-in theme options. Go to File > Preferences > Theme to switch between light, dark, and high contrast modes. The interface scales well on different screen sizes, and you can adjust font sizes in the preferences for better readability.
Board Manager Installation for Popular Arduino Boards
The Board Manager is your gateway to supporting a wide range of Arduino boards and compatible microcontrollers. Access it through Tools > Board > Boards Manager or use the board manager icon in the left sidebar. The search functionality makes finding specific boards quick and easy.
Start by installing support for the most common Arduino boards:
| Arduino AVR Boards | Arduino AVR Boards | Uno, Nano, Mega, Leonardo |
| ESP32 | ESP32 by Espressif | WiFi/Bluetooth projects |
| ESP8266 | ESP8266 Community | IoT applications |
| Arduino SAMD | Arduino SAMD Boards | MKR series, Nano 33 |
For ESP32 boards, you’ll need to add the additional boards manager URL. Copy https://dl.espressif.com/dl/package_esp32_index.json and paste it into File > Preferences > Additional Boards Manager URLs. After restarting the IDE, ESP32 options will appear in the Board Manager.
Installing board packages downloads the necessary compilers, libraries, and tools for each platform. This process happens automatically, but larger packages, such as ESP32, can take several minutes depending on your internet connection. The status bar shows download progress, so you can continue working on other tasks.
Library Manager Setup and Essential Library Installation
The Library Manager streamlines adding functionality to your projects. Access it via Tools > Manage Libraries or the library icon in the sidebar. The interface displays thousands of community-contributed libraries, each with descriptions, compatibility information, and user ratings.
Essential libraries every Arduino developer should install include:
- WiFi – Built-in library for WiFi-enabled boards
- ArduinoJson – JSON parsing and generation
- PubSubClient – MQTT communication
- Adafruit NeoPixel – LED strip control
- DHT sensor library – Temperature and humidity sensors
- LiquidCrystal – LCD display control
- Servo – Motor control library
The search function supports filtering by category, architecture, and type. When you find a library, click “Install,” and the IDE handles dependencies automatically. Version management is built in – you can update libraries individually or check for updates across your entire collection.
Library documentation is accessible directly from the manager. Many libraries include example sketches that demonstrate basic usage. These examples appear in File > Examples after installation, organized by library name. This integration makes learning new libraries much more manageable.
USB Driver Configuration for Board Recognition
Proper USB driver configuration ensures that your computer recognizes Arduino boards when they are connected. Most modern operating systems handle this automatically, but some boards require specific drivers or manual configuration.
Windows users might need to install drivers for clone boards or older Arduino models. The Arduino IDE installation typically includes necessary drivers, but if your board isn’t recognized, check Device Manager for unknown devices. Right-click any unrecognized Arduino-like device and select “Update Driver,” then browse to the Arduino IDE installation directory’s drivers folder.
For ESP32 and ESP8266 boards using CP2102 or CH340 USB-to-serial chips, separate drivers are often required. Download these directly from the manufacturer’s website. After installation, restart your computer to ensure the drivers load properly.
Linux users rarely encounter driver issues, as most distributions include Arduino-compatible drivers by default. However, you may need to add your user account to the dialout group: sudo usermod -a -G dialout $USER. Log out and back in for changes to take effect.
Mac users benefit from automatic driver installation for genuine Arduino boards. Third-party boards might require additional drivers, which are usually installed via standard .pkg installers.
Test your connection by selecting your board type in Tools > Board and the correct port in Tools > Port. A properly configured setup shows your board’s serial port clearly labeled in the port menu.
Testing Your Arduino IDE Installation with Sample Projects
Creating Your First Blink Program
Start with the classic “Blink” sketch, which makes an LED flash on and off. This simple program serves as the perfect introduction to Arduino programming and helps verify that your IDE installation works correctly.
Open Arduino IDE 2.3.6 and navigate to File > Examples > 01.Basics > Blink. The code will appear in a new window, showing the basic structure of an Arduino sketch. The program contains two main functions: setup(), which runs once when the board starts, and loop(), which runs continuously.
Before compiling, select your Arduino board from Tools > Board. Choose the correct port from Tools > Port – it typically shows as COM3, COM4 (Windows) or /dev/ttyUSB0 (Linux). The board and port selections appear in the bottom-right corner of the IDE.
Click the checkmark icon or press Ctrl+R to compile the sketch. The IDE will verify your code and display “Done compiling” in the output window if the compilation is successful. Any syntax errors will appear with line numbers, making debugging straightforward.
The default Blink sketch uses pin 13, which connects to the built-in LED on most Arduino boards. You can modify the delay values to change the blinking speed – try changing delay(1000) to delay(500) for faster blinking.
Uploading Code to Arduino Board Successfully
Connect your Arduino board to your computer using a USB cable. The power LED on the board should illuminate, indicating a proper connection. Make sure you’re using a data cable, not just a charging cable, as some USB cables only carry power.
Click the right arrow icon or press Ctrl+U to upload your compiled sketch. The IDE will first recompile the code, then transfer it to your Arduino board. During upload, you’ll see the TX and RX LEDs on most Arduino boards flashing, indicating data transmission.
Watch the output window for upload progress. A successful upload displays “Done uploading” with details about the sketch size and available memory. If the upload fails, check these common issues:
- Wrong board or port selected.
- Another program using the serial port
- Faulty USB cable or connection
- The board is not receiving power.
- Driver issues with your operating system
Some Arduino clones require pressing the reset button right before clicking upload. The timing can be tricky – press reset, then immediately click upload. The IDE will wait a few seconds before starting the transfer process.
If you encounter “permission denied” errors on Linux, add your user to the dialout group: sudo usermod -a -G dialout $USER. Log out and back in for changes to take effect.
Serial Monitor Configuration and Communication Testing
The Serial Monitor provides a window into your Arduino’s operation, allowing bidirectional communication between your computer and the microcontroller. Access it through Tools > Serial Monitor or click the magnifying glass icon in the top toolbar.
Configure the baud rate to match the value specified in your sketch’s Serial.begin() command. The default is usually 9600 baud, shown in the dropdown menu at the bottom-right of the Serial Monitor window. Mismatched baud rates result in garbled text or no communication.
Test serial communication with this simple sketch:
void setup() { Serial.begin(9600); Serial.println("Arduino IDE 2.3.6 Test");}void loop() { Serial.println("Hello from Arduino!"); delay(2000);}
Upload this code and open the Serial Monitor. You should see “Arduino IDE 2.3.6 Test” followed by “Hello from Arduino!” every two seconds. This confirms that your Arduino can successfully send data to your computer.
Test two-way communication by modifying the loop to read incoming serial data:
void loop() { if (Serial.available()) { String message = Serial.readString(); Serial.print("You sent: "); Serial.println(message); }}
Type messages in the Serial Monitor’s input field and press Enter. The Arduino will echo your messages back, proving bidirectional communication works. Set the line ending to “Newline” in the dropdown menu for proper message termination.
The Serial Plotter, accessible through Tools > Serial Plotter, visualizes numeric data as real-time graphs. Send comma-separated values from your Arduino to create multiple plot lines simultaneously.
Getting Arduino IDE 2.3.6 up and running doesn’t have to be complicated. You’ve learned how to check your system requirements, download the software safely from official sources, and walk through the installation process for your specific operating system. The initial configuration steps help you customize the IDE for your needs, and testing with sample projects confirms everything works properly.
Now you’re ready to dive into the world of Arduino programming. Start with simple projects to get comfortable with the interface, then gradually work your way up to more complex builds. The Arduino community is incredibly supportive, so don’t hesitate to explore forums and tutorials as you develop your skills. Your Arduino IDE 2.3.6 setup is complete – time to start creating something amazing.


Leave a Reply