Want to learn electronics or build robots? If you’re a student, educator, parent, or hobbyist, an Arduino kit is an easy, affordable way to start. With simple instructions and endless projects, you can quickly build a circuit or robot at home. Arduino kits are fun for all ages and skill levels.
After all, Arduino boards are found throughout the US, in STEM classrooms, labs, and colleges, helping to support the growth of electronics education over the past decade.
To help you get started, this guide breaks down what comes in an Arduino kit, how it works, the programming language used, and what you can build with it.
Let’s keep it simple and practical.
What is an Arduino Kit and Who is it For?
Ever looked at a smart device and thought, “I wish I knew how that worked?” That’s exactly why Arduino kits exist. In the US, these kits are the “LEGOs of the digital age.” They’re not just for middle school kids; they’re also the primary tool for Silicon Valley prototypers and backyard inventors alike.
At its core, the kit is built around an Arduino Uno. Think of this as a tiny, rugged computer without a screen, but with plenty of “pins” to talk to the physical world.
Breaking Down the Components
When you crack open a fresh kit, you’ll see a sea of resistors, capacitors, and jumper wires. But the “heroes” are the sensors. You get components that can detect motion, measure humidity, or even read your fingerprint. Once you understand the hardware, the next step is learning the programming language used by Arduino.
Newcomers often stress about the software side. Arduino uses a simplified flavor of C++.
The magic happens in the Arduino IDE (Integrated Development Environment). Instead of writing thousands of lines of code, you use “sketches”—pre-made coding templates that give instructions to the board. If you can follow a recipe for sourdough bread, you can learn to code an Arduino.
A basic Arduino sketch has two parts:
- setup()
- loop()
The setup part runs just once at the start. The loop repeats, checking for conditions or input.
Inside the loop function, the board constantly checks things like light sensor levels, if you write your code that way.
In the U.S., many middle school students are introduced to programming through Arduino, which is beginner-friendly. Only later do they move on to learning full C++.
It’s a great introduction to programming logic.
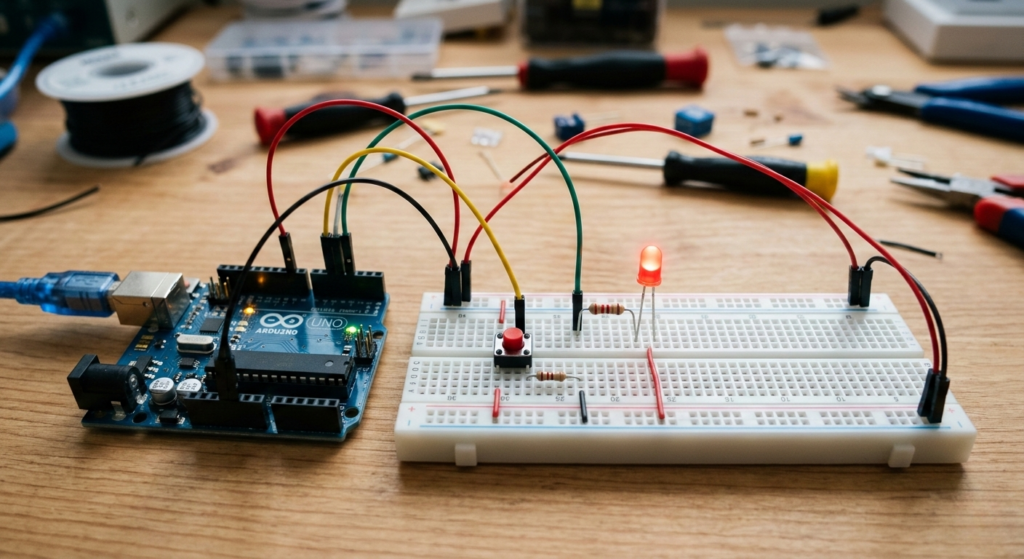
Push Button Arduino Projects for Beginners
The classic push button arduino project is simple but powerful.
Here are three beginner-friendly builds:
1. LED Toggle Switch
Press the button once, and the LED illuminates. Press it again to switch the light off, reinforcing binary control.
This project teaches the basics of digital input and output.
2. DIY Doorbell
Wire a push button and a buzzer. When the button is pressed, the circuit closes and a sound plays, mimicking a real doorbell.
This project offers an engaging activity for children.
3. Simple Counter
Each button press increases the number shown in the Serial Monitor, teaching counting with digital input.
This project introduces basic logic and variables.
In many U.S. STEM programs aimed at beginners, this is the first real electronics milestone students complete.
Popular Arduino Projects in the US
Arduino kits have become a staple in the American “Maker” culture. From high school classrooms to tech startups in California and Texas, these kits bridge the gap between simple coding and physical engineering.
Top Project Categories
- Smart Home & Gadgets: US hobbyists use Arduino to build custom home tech, such as smart light controls and motion-sensing alarms. It’s a popular way to prototype “Smart Home” ideas without the expense of commercial hubs.
- Educational Robotics: Robotics programs in US high schools rely on Arduino for building line-following and obstacle-avoiding robots because they are affordable and highly customizable.
- Environmental Monitoring: For science fairs, students often use Arduino to build weather stations or solar trackers, combining data-collection projects with sustainable energy concepts.
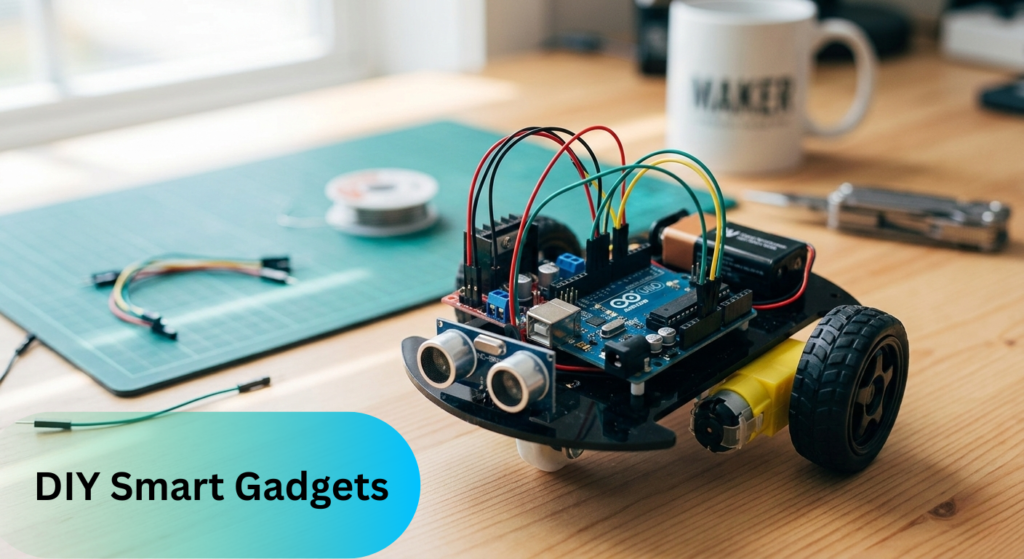
DIY Smart Gadgets
Hobbyists build:
- Digital clocks
- Garage door monitors
- Security systems
Many makers in states like California and Texas use Arduino to prototype startup ideas.
Arduino Project Comparison
This table helps you decide which project fits your skill level and goals:
| Home Automation | Medium | Sensors, Relays, Wi-Fi | DIY Homeowners |
| Science Projects | Low | LCDs, Sensors, Wires | Students/Beginners |
| Robot Kit Builds | High | Motors, Chassis, Drivers | Aspiring Engineers |
| Smart Gadgets | Medium | Buttons, LEDs, RTC | Prototype Startups |
How to Choose the Right Arduino Kit
Selecting an Arduino kit depends entirely on the user’s experience and end goals. Here is a concise breakdown to help you decide.
Choosing by User Level
- For Kids (8–12): Prioritize safety and simplicity. Choose kits with pre-labeled parts and guides that present coding as a fun, game-like activity.
- For Teens: Prioritize sensors and engaging challenges. Select kits that support robotics competitions or more advanced coding tasks for this age group.
- For Hobbyists: Prioritize versatility. Select kits designed to work with Shields (add-on boards) and a wide range of components for diverse DIY projects.
- Engineers: Use this for rapid prototyping. While it is not industrial-grade, it is an effective tool for quickly and affordably testing proof-of-concept ideas.
Quick Comparison: Level vs. Priority
| Kids | Ease of Use | Visual manuals, Plug-and-play |
| Teens | Skill Growth | Robotics parts, complex sensors |
| Hobbyists | Expansion | Extra GPIO pins, Shield support |
| Engineers | Speed | Standardized layout, vast libraries |
Buying Tips for the US Market
When shopping at major electronics retailers or STEM stores, keep these four factors in mind:
- Compatibility: Ensure the board works with standard Arduino software (IDE).
- Resources: Check if the kit includes clear, English-language tutorials.
- Quality: Avoid “dirt-cheap” clones; reputable brands save you from hardware glitches.
- Completeness: Verify it includes a USB cable and basic jumper wires.
Essential Components Every Beginner Should Know
You don’t need to be an electrical engineer. Most people start with a simple touch.
Mastering the Arduino Push Button
The Arduino push button is humble but essential. It’s your first ‘Digital I/O’ lesson. Pressing it closes a circuit and sends a 5V signal to the board.
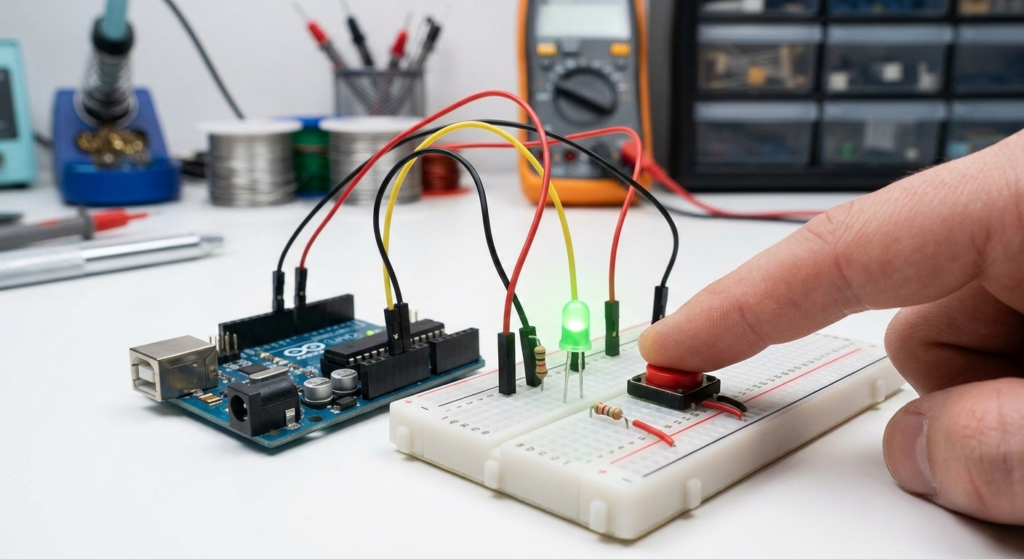
Using a Push-Button Arduino Setup
Want to learn how electronics make decisions? Setting up a push button Arduino project is the perfect starting point. You’ll write a simple program: if you press the button, the LED (a little light) turns on—if not, it stays off. This basic logic is used by hobbyists everywhere, from making their own garage door openers to building fun arcade buttons at home. It’s hands-on, easy to try, and always satisfying when it works.
Leveling Up: The Excitement of an Arduino Robot Kit
If you want to see your code truly come to life, buy an Arduino robot kit. It transforms the static experience of a breadboard into a mobile one.
Building Your First Autonomous Vehicle
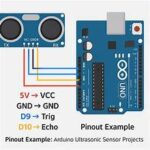
Most Arduino robot kit packages come with two or four motors, a chassis, and an ultrasonic sensor. An ultrasonic sensor is an electronic device that measures distance to objects by sending out sound waves and detecting the reflection. This sensor acts like the robot’s “eyes,” helping it detect if a wall is in the way.
Reaching the point where your robot navigates your living room without hitting obstacles is a milestone. It introduces you to real-world physics, such as motor torque and battery usage concepts you may not encounter with just screen-based projects.
Top 3 Projects to Start This Weekend
Don’t let your kit gather dust. Try these three classic US maker projects:
- Set up an Arduino with a push button and buzzer. When someone opens your drawer and presses the button, the buzzer sounds, serving as an alert system.
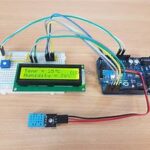
- Attach a moisture sensor to a water pump. When the soil is dry, the Arduino activates the pump, watering your plant automatically.
- Use an ultrasonic sensor to measure distance. The Arduino displays this measurement on a small LCD, turning the project into a functional electronic ruler.
Internal Linking Ideas
- Choosing the Right Power Supply: Why your Arduino kit might need more than just a USB cable.
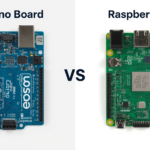
- Arduino vs. Raspberry Pi: Which one is actually better for your specific project?
- Mastering the Breadboard: How to wire things without making a “spaghetti” mess of wires. A breadboard is a reusable device that allows you to connect electronic components together without soldering.
High-Authority External Reference: Arduino Official Documentation
For anyone committed to becoming skilled at electronics, the Official Arduino Documentation acts as the gold standard. Beyond acting as a basic setup guide, it functions as the most comprehensive technical manual available for the global “Maker” community. Based on this foundation, detailed data sheets additionally enrich the resource.
- The official site provides detailed data sheets for each board, covering exact voltage limits, pinout configurations, and power consumption. Based on these thorough specs, you can also rely on Arduino’s standardized software support.
- Standardized Libraries: It provides a centralized repository of verified code libraries, ensuring your sensors and motors work reliably without the faults often found on unofficial forums.
- Community-Vetted Tutorials: Maintained by the creators of Arduino, the problem-solving steps and project tutorials are high-authority references that reduce the learning curve for beginners and specialists alike.
Quick Tip: Whenever you write about your Arduino projects or share your results, it’s best to include a link to the official Arduino reference. That way, anyone reading your work can check the latest information and trust that what you’ve shared is up to date.
FAQs
1. Is an Arduino kit hard to learn?
Not at all. The community is huge. Stuck? Search YouTube or Reddit for quick answers. Most people get their first LED to blink in under 10 minutes.
2. What coding language does Arduino use for robots?
It’s still C++. Whether you are making an LED blink or building a complex Arduino robot kit, the language remains the same. You just use different sets of pre-written code, called “libraries,” to control hardware such as motors.
3. Do I need to know math?
Basic math helps with timing or sensor thresholds, but you don’t need calculus to build cool stuff.
4. How much memory does the ESP32 use during an OTA update?
Memory usage depends on your firmware size and configuration, but it typically requires twice the Flash memory space (using an A/B partitioning method, where there are two separate areas for storing firmware, so one can be updated while the other runs) to safely store the new image. For RAM, streaming is recommended, as it uses only 4KB–16KB of buffer memory (temporary storage for data being transferred), keeping the device stable and preventing crashes.
Final Thought
An Arduino kit isn’t just a toy; it’s a career starter. From learning which coding language Arduino uses to wiring your first push-button Arduino, you’re gaining in-demand US tech skills. The best part? There is no “wrong” way to build. If it works, it’s right. If it doesn’t work, you’ve just found a great opportunity to troubleshoot.


Leave a Reply