192.168.4.1. That string of numbers showed up on my serial monitor the first time I ever wired up an ESP32, right after the line “AP IP address,” and I had no clue what to do with it. I typed it into my phone’s browser like it was a website and just stared at the loading screen.
Turns out that’s exactly how it’s supposed to work. You just need to know a couple of things first, and this is where most tutorials skip straight past the part that actually trips people up.
What Is 192.168.4.1?
192.168.4.1 is the default IP address your ESP32 or ESP8266 assigns itself the moment your sketch starts a WiFi access point. Typing that address into any browser connected to the board’s network opens its built-in web page, letting you flip a pin, read a sensor, or hand over your home WiFi password.
No router is involved here. Your ESP32 becomes the router, at least for the small network it creates. It hands out its own IP addresses, runs its own tiny web server, and 192.168.4.1 is simply the address it gives itself as the head of that network.
This matters because plenty of home routers, mesh systems, and ISP-supplied gateways use addresses in the same private range. That overlap is where most of the confusion starts, and we’ll get into fixing it further down.
<a id=”why-your-board-uses-this-address”></a>
Why Your ESP32 or ESP8266 Uses This Address
192.168.4.1 falls inside the private IP block reserved for local networks, the same family as 192.168.1.1 or 192.168.0.1 that your home router probably uses. It never touches the public internet, so there’s zero risk of it clashing with someone else’s device across town.
Espressif’s own networking documentation confirms the ESP32 and ESP8266 default their access point to the 192.168.4.x block, and that the chip can’t tell the difference between its own access point and an outside router using that same range, which is exactly the kind of conflict that trips people up further down the page.
It’s baked into the WiFi library itself. Every basic access point example, including the official one shipped with the ESP32 Arduino core, uses this same default unless you override it with a few extra lines of code. We’ll show you those lines shortly.
<a id=”how-to-connect”></a>
How to Connect to Your Board at 192.168.4.1
Connecting is simple once you know the order of operations. Skip a step and the page just spins forever.
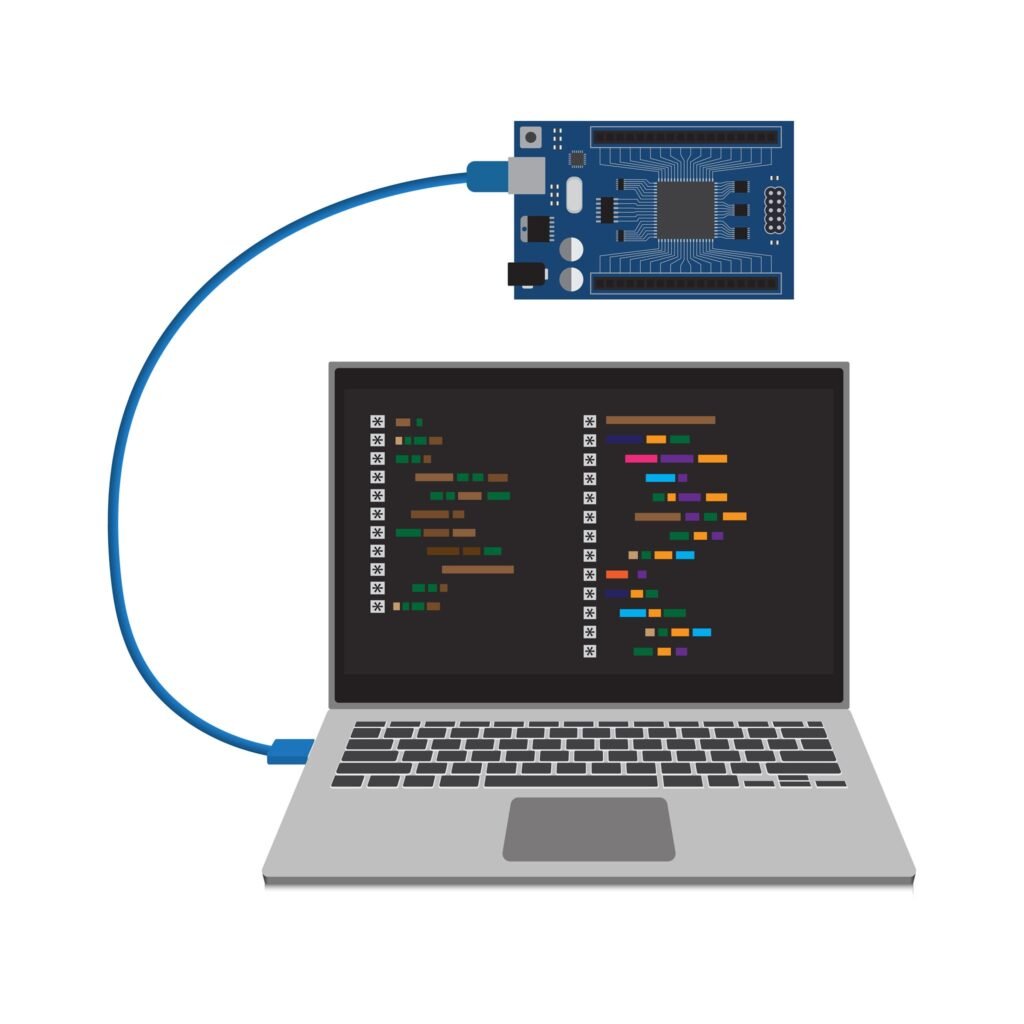
- Upload a sketch that starts a soft access point, then open the serial monitor to confirm it printed an IP address.
- On your phone or laptop, open WiFi settings and connect to the board’s network name, the one you set in your code.
- Enter the password you defined in the sketch. It needs to be at least 8 characters or the connection will fail silently.
- Open a browser and type 192.168.4.1 directly into the address bar, not into a search box.
- Wait a second or two. The board’s page should load.
Here’s a working example you can upload as-is. It creates an access point and a simple web page for turning an LED on and off, using the WebServer library instead of raw socket parsing, which keeps the code much easier to read than the classic example most tutorials copy and paste.
cpp
#include <WiFi.h>
#include <WebServer.h>

const char* apName = "ArduinoCraft-AP";
const char* apPassword = "buildsomething"; // 8+ characters required

WebServer server(80);
const int ledPin = 2;

void handleRoot() {
  server.send(200, "text/html",
    "<h1>ESP32 Control Panel</h1>"
    "<a href=\"/on\">Turn LED On</a><br>"
    "<a href=\"/off\">Turn LED Off</a>");
}

void handleOn() {
  digitalWrite(ledPin, HIGH);
  server.send(200, "text/html", "LED is on. <a href=\"/\">Back</a>");
}

void handleOff() {
  digitalWrite(ledPin, LOW);
  server.send(200, "text/html", "LED is off. <a href=\"/\">Back</a>");
}

void setup() {
  Serial.begin(115200);
  pinMode(ledPin, OUTPUT);

  WiFi.softAP(apName, apPassword);
  Serial.print("Access point ready at: ");
  Serial.println(WiFi.softAPIP());

  server.on("/", handleRoot);
  server.on("/on", handleOn);
  server.on("/off", handleOff);
  server.begin();
}

void loop() {
  server.handleClient();
}
New to the Arduino IDE or ESP32 boards in general? [INTERNAL LINK: our ESP32 getting started guide] walks through installing the board package first.
<a id=”common-problems”></a>
Common 192.168.4.1 Problems (And Real Fixes)
The page just spins and never loads. Your phone or laptop probably reconnected to your home WiFi in the background, which happens automatically on most phones. Double check you’re still connected to the board’s network, not your regular one.
You can ping the board but no page shows up. This usually means the server never actually started. Check your serial monitor for a “Server started” message, and confirm server.begin() runs after WiFi.softAP(), not before.
No internet while connected to the board. That’s expected. The access point your board creates is a closed network with no path to the outside internet by design. You can reach 192.168.4.1, you just can’t browse anything else at the same time.
192.168.4.1 keeps loading your router’s login page instead of your board’s. This is the one that catches experienced makers off guard. Some routers and mesh systems, including certain eero setups, also use 192.168.4.1 or the wider 192.168.4.x block as their own gateway range. A September 2025 troubleshooting thread on the official Arduino forum documents this exact scenario, where a maker’s ISP-supplied router used that same address block and swallowed every ESP32 access point they tried to reach.
Key takeaway: if 192.168.4.1 keeps resolving to your home router instead of your board, the fix isn’t a different browser or a hard refresh. It’s giving your board’s access point a completely different IP range, which is exactly what the next section covers.
<a id=”how-to-change-the-ip”></a>
How to Change the Default IP Address
You can move your board off 192.168.4.1 entirely using WiFi.softAPConfig(), called before WiFi.softAP(). The part people get wrong, based on that same forum thread, is picking a new address still inside the same subnet as their home router. That causes the identical conflict all over again.
Pick a range your router almost certainly isn’t using. Something like 192.168.20.x rarely overlaps with default router settings, which mostly cluster around 192.168.0.x, 192.168.1.x, and 192.168.4.x.
cpp
#include <WiFi.h>

IPAddress localIP(192, 168, 20, 1);
IPAddress gateway(192, 168, 20, 1);
IPAddress subnet(255, 255, 255, 0);

void setup() {
  Serial.begin(115200);

  WiFi.softAPConfig(localIP, gateway, subnet);
  WiFi.softAP("ArduinoCraft-AP", "buildsomething");

  Serial.print("Custom access point IP: ");
  Serial.println(WiFi.softAPIP());
}

void loop() {
}
Reflash, reconnect to the access point, and load 192.168.20.1 instead. If your router ever changes its own range down the line, just repeat the same fix with a new subnet.
<a id=”project-ideas”></a>
Arduino Project Ideas That Use an Access Point
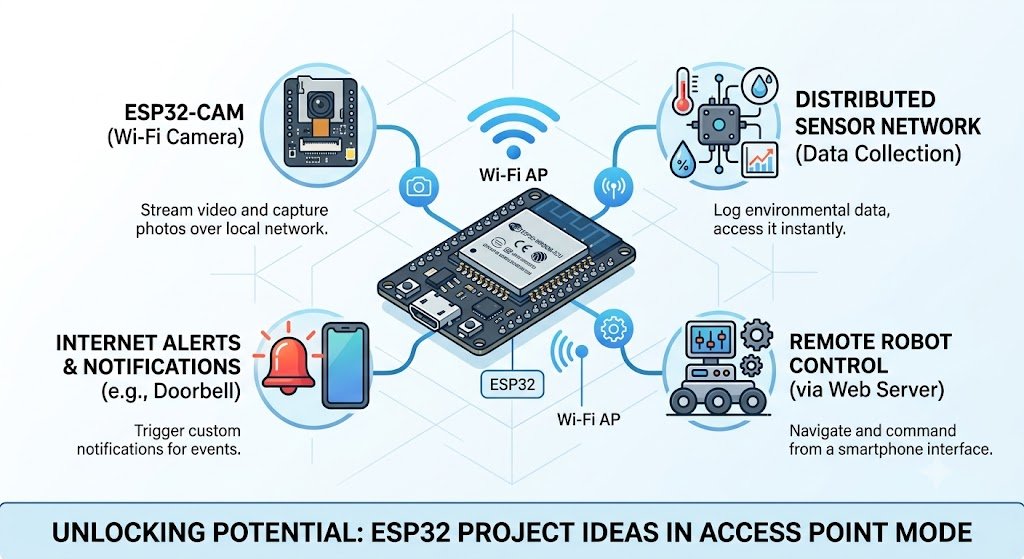
Once 192.168.4.1 clicks, it opens up a whole category of Arduino project ideas that don’t need your home WiFi at all. Here are ones worth building:
- A WiFi credential setup portal for any sensor project, so you can hand a finished device to someone else and let them enter their own network password without touching code. [INTERNAL LINK: WiFiManager captive portal tutorial]
- An ESP32-CAM remote viewer you can check from a phone in the same room, useful for a workshop camera or a pet feeder. [INTERNAL LINK: ESP32-CAM security camera project]
- A field sensor station for a garden or a garage, where you connect directly to the board on-site instead of relying on spotty WiFi coverage out there.
- A tiny robot control page, steering a small rover from a phone browser with no app required.
- A backup config panel for any IoT device, so if it ever loses its saved WiFi credentials, you can still reach it directly to fix things.
- A motion alert box that serves its own status page, handy for a shed or workshop where you don’t want it depending on your main router’s uptime.
Brand new to Arduino? [INTERNAL LINK: best Arduino boards for beginners] breaks down which board to start with.
<a id=”beginner-mistakes”></a>
Beginner Mistakes to Avoid
- Assuming the access point gives you internet access. It doesn’t, and that’s normal.
- Setting a password under 8 characters and wondering why the connection silently fails.
- Choosing a custom IP still inside your router’s existing range, which recreates the same conflict you were trying to fix.
- Forgetting that most phones auto-reconnect to saved WiFi networks, kicking you off the board’s access point without warning.
- Trying to connect more than a handful of devices at once. Espressif’s documentation caps the ESP32 and ESP8266 soft access point at 8 simultaneous clients, and recommends staying closer to 4 for stable performance.
<a id=”expert-tips”></a>
Expert Tips for a Smoother Setup
- Use the tzapu WiFiManager library instead of hardcoding credentials. It handles the access point, the captive portal, and falling back to your saved network automatically.
- Set up mDNS so you can reach your board at something like
esp32.localinstead of memorizing an IP address, especially handy once you’ve changed the default. - If you’re running several boards at once, give each one a distinct SSID and a distinct custom IP so you’re never guessing which one you’re actually connected to.
- Keep a static IP for station mode too once your board joins your real network, so it doesn’t shift addresses every time your router reassigns leases.
<a id=”faqs”></a>
FAQs
What is 192.168.4.1 used for?
192.168.4.1 is the default IP address for ESP32 and ESP8266 boards running in access point mode. Typing it into a browser opens the board’s built-in web page or setup portal. Some home routers use the same address, which is where mix-ups start.
Why can’t I connect to 192.168.4.1?
Your device is probably still connected to your home WiFi instead of the board’s access point. Reconnect your phone or laptop to the board’s network name first, then reload the page. If it still fails, check the serial monitor to confirm the server actually started.
Can I change 192.168.4.1 to a different address?
Yes. Use WiFi.softAPConfig() before calling WiFi.softAP() and pick an address outside your home router’s subnet. Reusing a range your router already occupies just causes the same conflict again.
Is 192.168.4.1 the same as my router’s IP address?
Not usually, but some routers and mesh systems, including certain eero setups, do use 192.168.4.1 as their own gateway. When that happens, your board’s access point and your router end up competing for the same address.
Do I need internet access to use 192.168.4.1?
No. The access point your board creates is a closed local network with no path to the internet by design. You can still load the board’s web page and control it, you just can’t browse other sites while connected to it.
<a id=”final-thoughts”></a>
Final Thoughts
192.168.4.1 looks cryptic the first time you see it, but it’s really just your board introducing itself. Once you know how to reach it, when it breaks, and how to move it out of the way of your router, it stops being a mystery and starts being one of the more useful tricks in your Arduino toolkit.
Disclaimer: IP address ranges, router defaults, and firmware behavior can vary by manufacturer and hardware revision. Always check your specific board and router documentation before changing network settings on a live project.





Leave a Reply